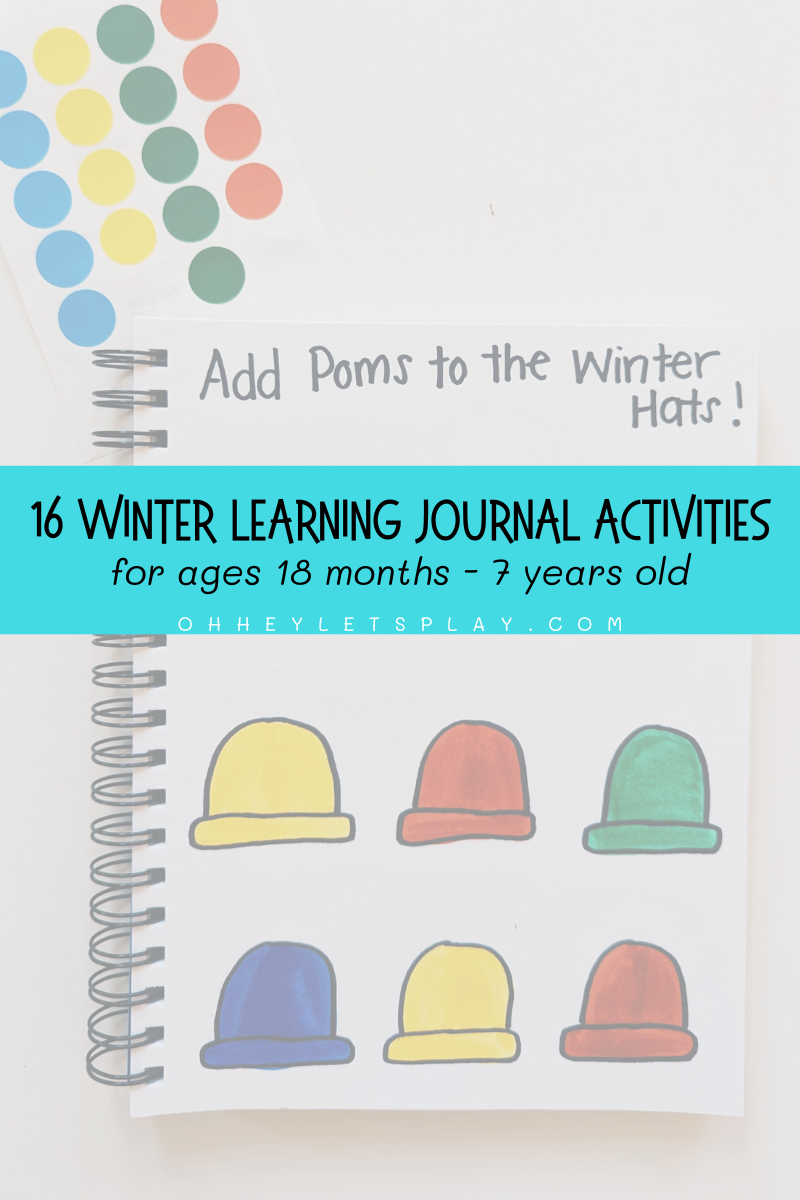

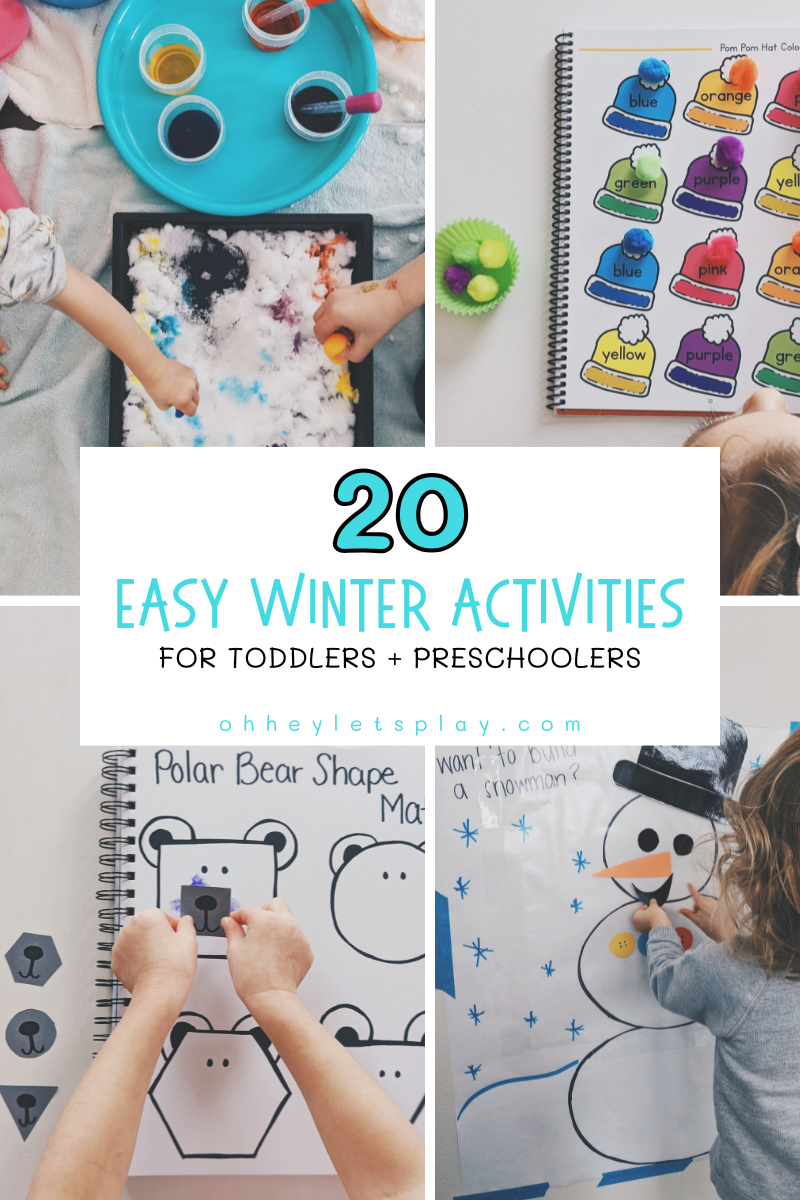
20 Easy Winter Activities for Toddlers and Preschoolers

20 Easy Indoor Winter Activities for Kids
(Simple, low-prep ideas for toddlers and preschoolers)
When the days are short, the temps are freezing, and everyone starts climbing the walls a little — having a handful of simple indoor winter activities ready to go can be such a lifesaver.
These are the kinds of activities I love most:
- little to no prep
- things you can set up with what you probably already have
- hands-on, engaging, and secretly full of learning
All of these activities are tested and approved by my own kids and have been shared at some point over the years. You’ll find a mix of:
- hands-on sensory play
- simple crafts and book pairings
- learning journal activities
- pages from my Winter Activity Book and printable packs
- easy fine motor + pre-writing ideas
Most of these activities use supplies you probably already have on hand, and many can be adapted for multiple ages so everyone feels included.
The links provided in this post are affiliate links, and your support through these links earns me a modest commission if you choose to make a purchase.
Let’s jump in!
❄️Sensory + Hands-On Winter Activities
1. Arctic Water Play
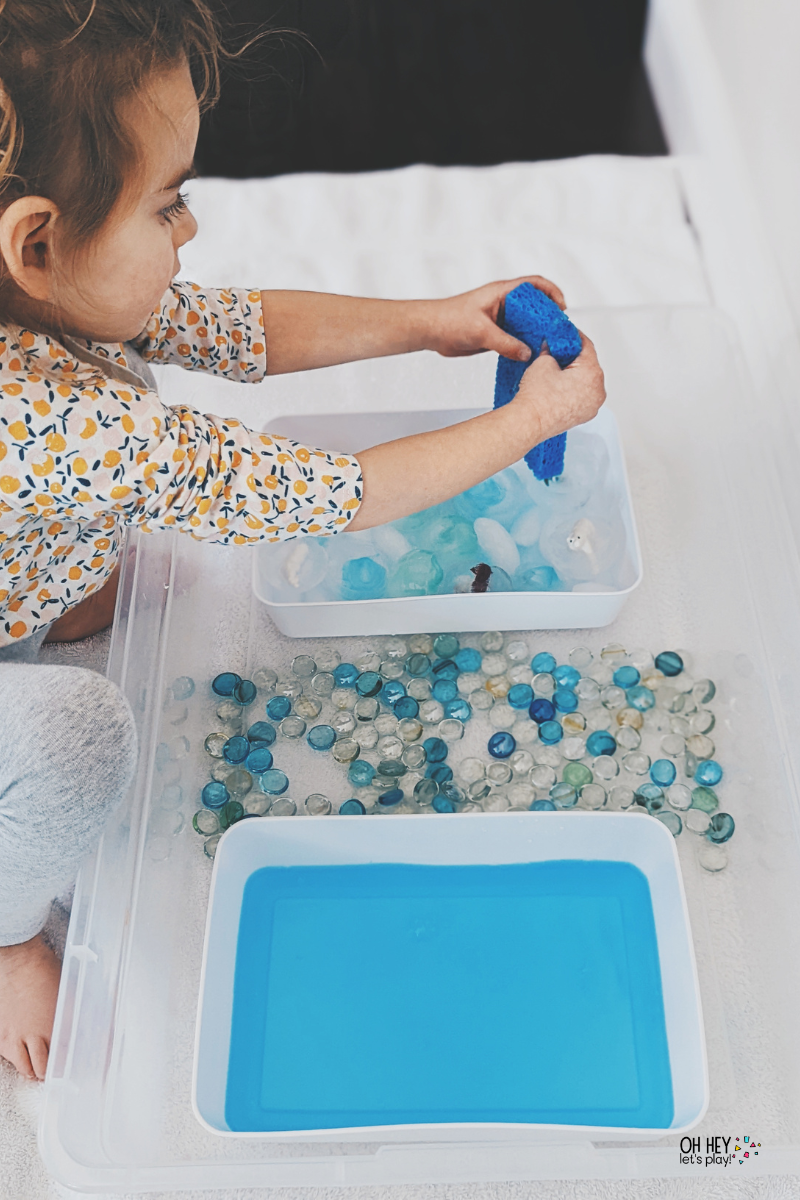
This activity is so calming and kids can play forever!
Materials:
- different sized bins
- warm water
- blue food coloring
- small arctic animal figures
- silicone baby food storage tray
- blue reusable “ice” cubes (optional - just for fun)
- regular ice cubes
- blue + white vase filler gems (choking hazard - supervise closely with young children)
- sponge
- towel(s)
How to set it up:
Place small arctic animals in the sections of a silicone baby food tray, fill with water, and freeze for a few hours or overnight.
Freeze the blue reusable ice cubes as well if you’re using them.
When you’re ready to play, fill one small bin with warm water and a drop or two of blue food coloring.
Add the frozen “animal cubes” and blue reusable cubes to a second bin.
Scatter the blue and white gems between the two tubs and add a sponge.
Invite your child to soak the sponge in the warm “ocean” water and squeeze it over the icy animals to melt them free. Once all the animals are rescued, most kids naturally shift into sensory water play and pretend play — splashing, scooping gems, and making up stories about their arctic animals.
Skills developed:
fine motor strength (all that squeezing!), sensory exploration, cause-and-effect, imaginative play, language development
2. Colored Snow (brought inside!)
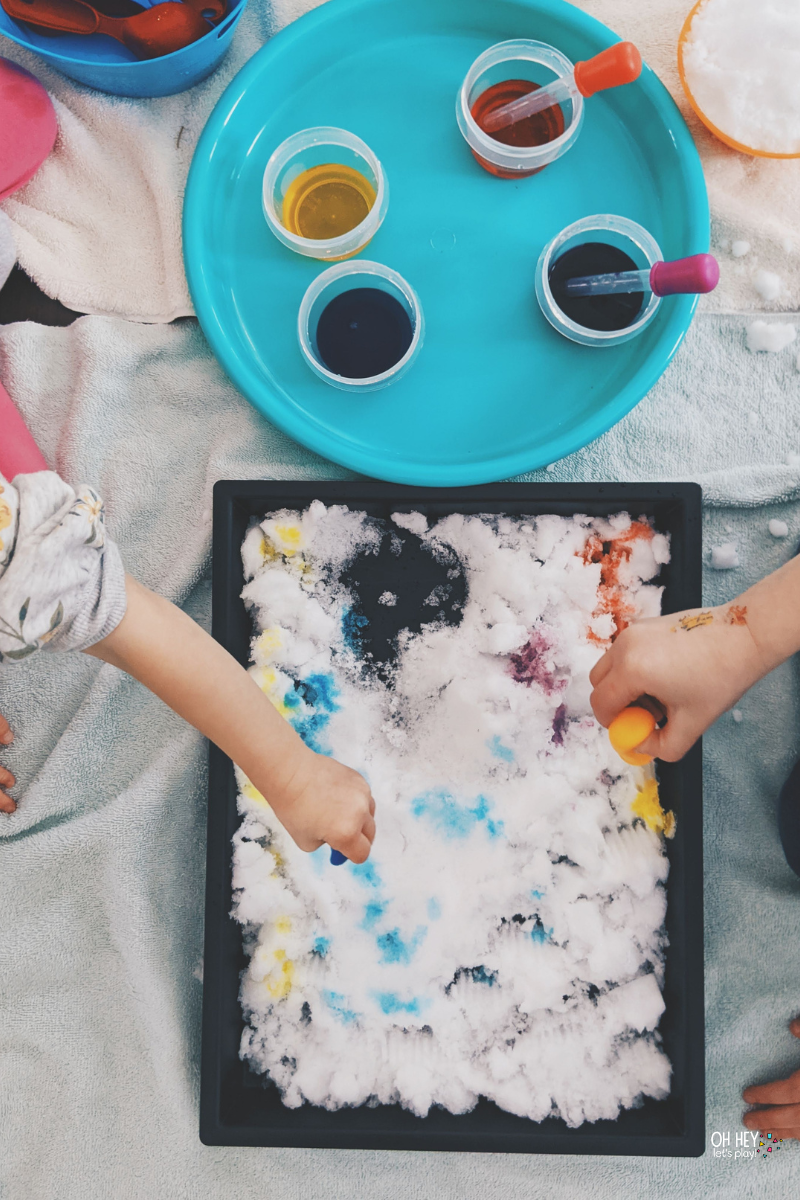
Got snow outside but don’t want to bundle up? Bring the snow to your kids.
Materials:
- tray or shallow bin for snow
- tray with small clear cups/containers or a muffin tin
- water
- food coloring
- eye droppers or pipettes
- towels for underneath / cleanup
How to set it up:
Scoop fresh snow into a tray or shallow bin and bring it inside.
Fill small cups or a muffin tin with water and add a drop or two of food coloring to each compartment.
Give your child eye droppers and invite them to squeeze the colored water onto the snow to “paint” it.
They can experiment with mixing colors, making rainbow sections, or focusing on one color at a time. The snow slowly melts as they work, which adds another fun sensory element.
Skills developed:
fine motor control, hand strength, color recognition, language development, sensory exploration
3. Construction Snow Play
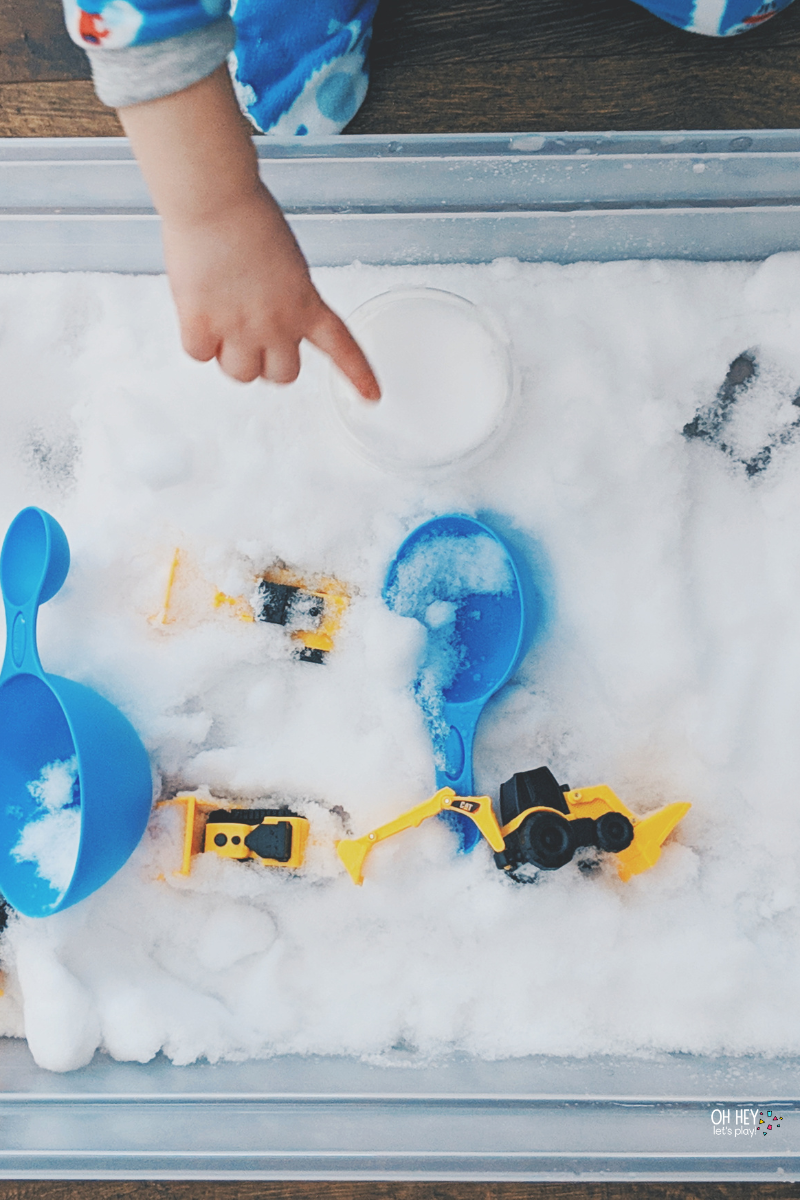
Another easy way to enjoy snow indoors — especially for little truck lovers.
Materials:
- snow
- clear plastic storage bin (check Dollar General)
- small construction trucks (dump trucks, excavators, loaders, etc.)
- measuring scoops, cups, or spoons
- towel under the bin for drips
How to set it up:
Fill a clear bin with snow and place it on top of a towel. Add small construction vehicles and a few scoops or spoons.
Kids can scoop, dump, pile, and “clear the roads” in their snowy construction site. You can add a simple prompt like, “Can you build a big snow pile?” or “Can you make a road all the way across the bin?”
Skills developed:
language development, sensory exploration, imaginative/pretend play, basic problem solving
4. Frozen Pom-Pom Rescue
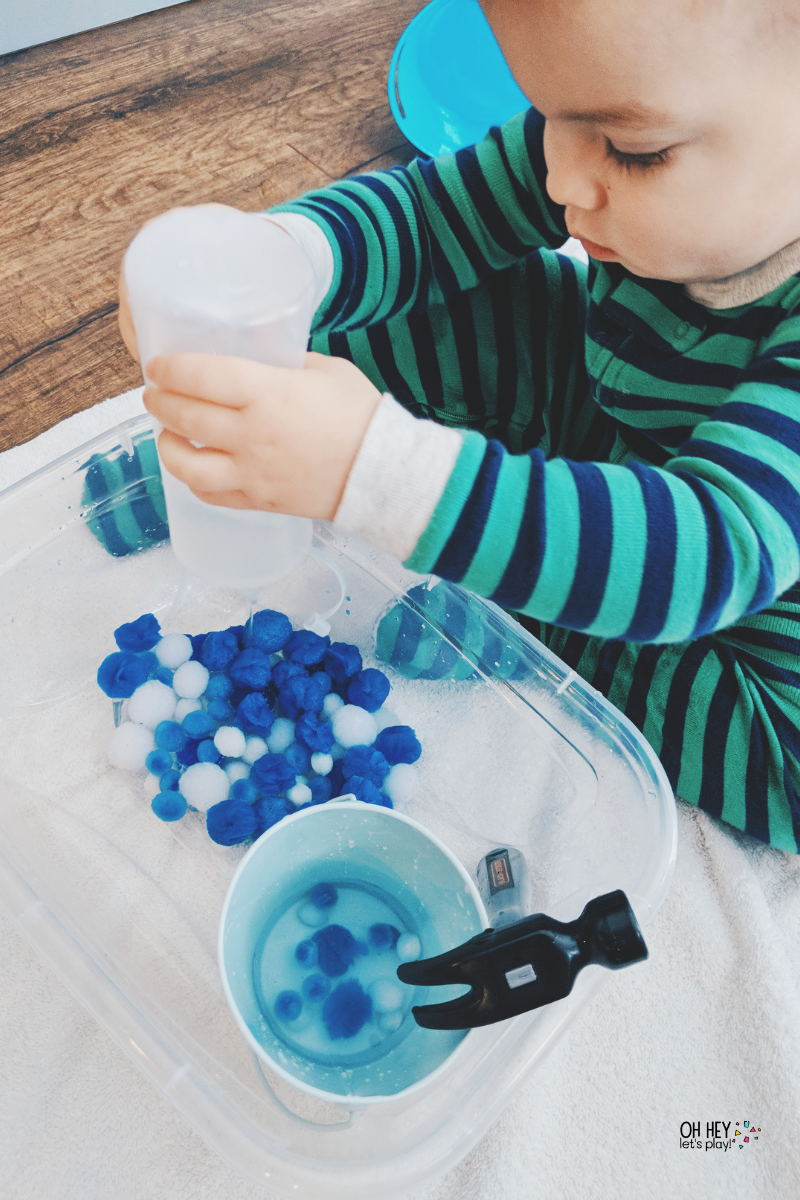
A winter twist on sensory play that works twice — first as an icy rescue, then as a water bin.
Materials:
- smaller bin or container (for freezing) - check Dollar Tree, or Tupperware works great for this, too!
- larger clear bin (for play)
- blue and white pom-poms
- water
- squeeze bottles or spray bottles filled with warm water
- small bowl for collecting “rescued” pom-poms
- optional: extra tools like a spoon, scoops, bowls, or a play hammer
- towels for underneath
How to set it up:
Fill a small container with blue and white pom-poms and water.
Freeze for a few hours or overnight until you have one solid block of icy pom-poms.
Pop the frozen block out into a larger bin.
Fill squeeze or spray bottles with warm (not too hot) water and invite kids to squirt, spray, and melt the ice to rescue the pom-poms.
Collect the “rescued” pom-poms in a small bowl.
Once all the pom-poms are free, don’t stop there — now you have a pom-poms-in-water sensory bin. Add scoops, bowls, or spoons and let them keep playing.
When you’re done, you can gently squeeze out the pom-poms and either:
- lay them on a towel to air-dry, or
- toss them into a mesh laundry bag and run them through the dryer — they fluff right back up!
Squeezing those bottles is amazing for hand-strength work that supports later skills like pencil grip, cutting, buttoning, and zipping.
Skills developed:
fine motor strength, hand control, sensory exploration, problem solving, language development
We love this activity so much that it gets its very own dedicated blog post — if your kids love it as much as mine, you can head there for more variations and tips.
5. Ice Rescue (with Winter Erasers)
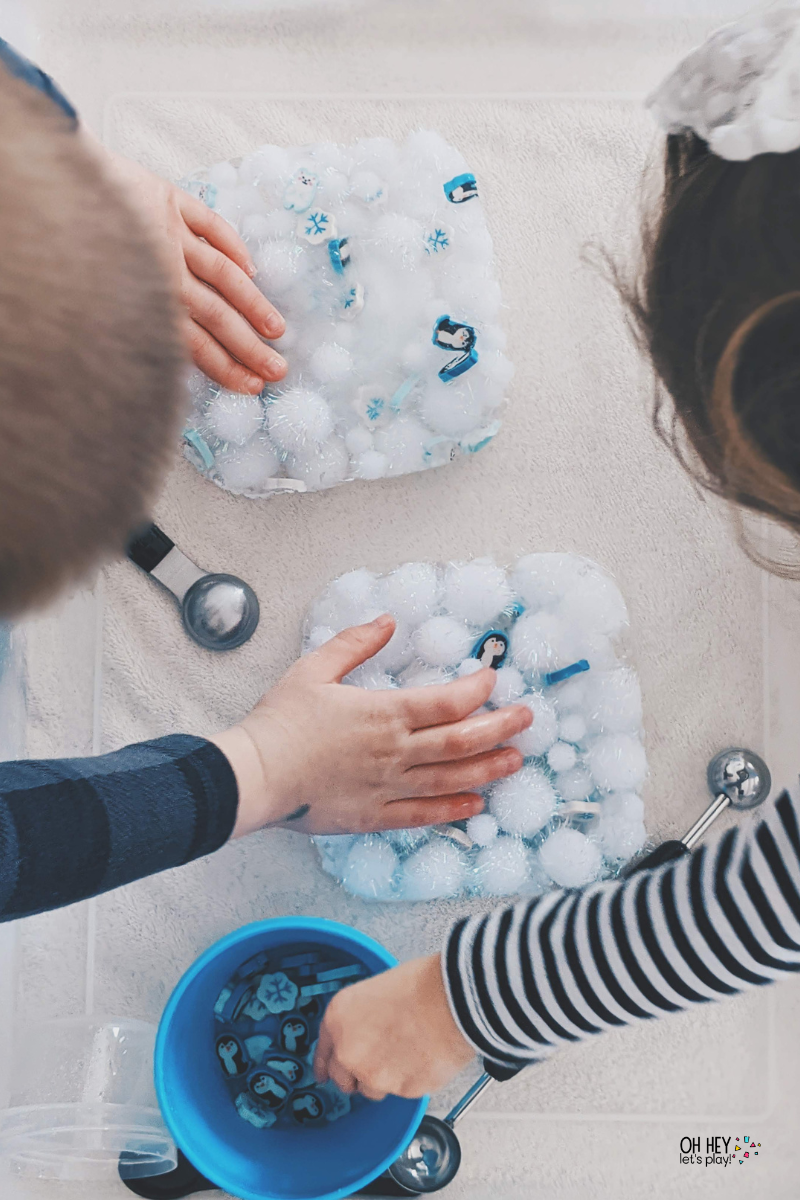
Same magical concept as the pom-pom rescue, with a fun wintery twist.
Materials:
- plastic food storage container (Tupperware-style)
- white sparkly pom-poms
- mini winter erasers (snowflakes, penguins, snowmen, etc.)
- water
- large clear bin or tray
- small cup or bowl for collecting the rescued pieces
- warm water + spoons or squeeze bottles (optional)
- towels
How to set it up:
Place white sparkly pom-poms and winter erasers into a food storage container.
Fill with water and freeze until solid.
Pop the block of ice out into a larger bin.
Add tools: a bowl for rescued erasers, maybe a spoon or squeeze bottle of warm water.
Kids can chip, scoop, swirl warm water, and explore the icy texture as they work to free all the little winter erasers. They’ll usually create their own little game out of it: “How many can I rescue?” or “Let’s get all the blue snowflakes out first!”
Skills developed:
fine motor strength, problem solving, hand–eye coordination, perseverance, sensory exploration
6. Build-a-Snowman Play-Doh Invitation
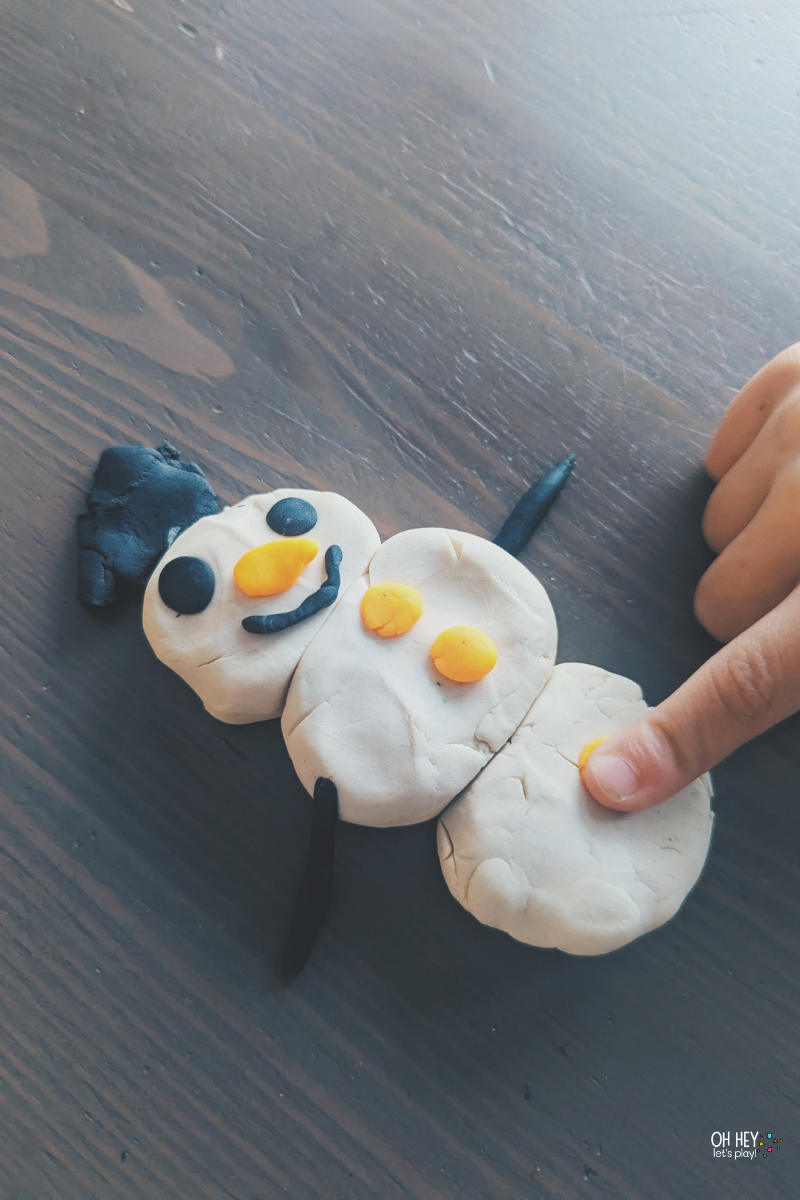
A super simple invitation that you can pull out again and again.
Materials:
- Play-Doh (white plus any other colors you have: black, orange, blue, etc.)
- optional: small loose parts like buttons, beads, or tiny sticks
How to set it up:
Set out a few colors of Play-Doh and invite kids to roll, squish, press, and build their own snowmen. They can:
- roll three snowballs for the body
- roll thin “snakes” for arms or scarves
- pinch tiny pieces for eyes and buttons
This was one of the activities in our Advent Activity Calendar, but it’s one we come back to all winter long.
Skills developed:
fine motor strength, creativity, hand–eye coordination, spatial awareness, imaginative play
🎨 Winter Craft Activities
These are the “sit down and create something” moments — perfect for a cozy afternoon with hot cocoa nearby.
7. Melted Snowman Craft (Puffy Paint)
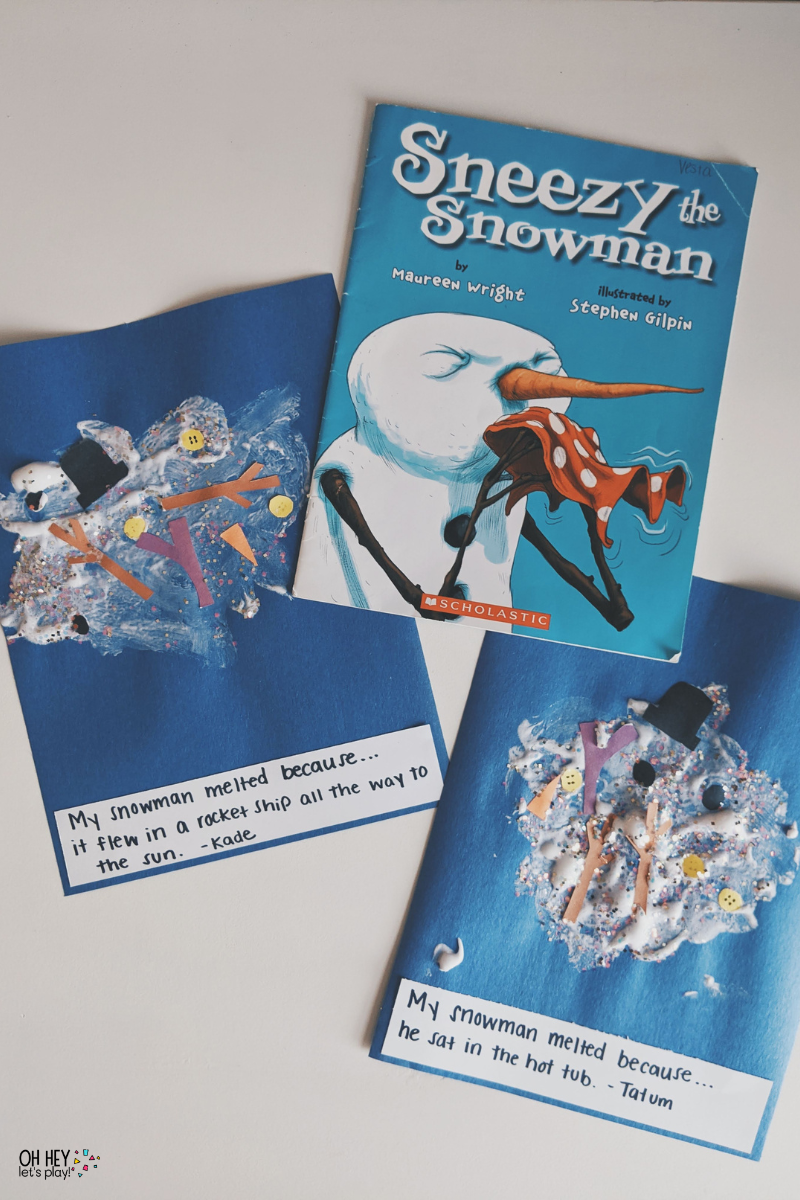
One of our repeat winter favorites — and it pairs perfectly with the book Sneezy the Snowman.
Materials:
- blue or dark-colored construction paper
- white liquid glue
- shaving cream (Dollar Tree)
- bowl + spoon for mixing
- colored construction paper for snowman parts (hats, noses, scarves, arms, buttons, etc.)
- glitter (optional but magical ✨)
- black Sharpie or marker
How to set it up:
Mix equal parts white glue and shaving cream in a bowl to make puffy paint. Stir until it’s thick and fluffy.
Have your child paint a big puddle of “melted snowman” onto their paper.
Before the paint dries, offer pre-cut snowman pieces made from colored construction paper — hats, noses, arms, scarves, buttons — and invite them to press the pieces right into the puffy paint.
Once it’s dry, the texture stays soft and squishy.
At the bottom of the page, use a black Sharpie to write:
My snowman melted because…
Then write your child’s response (or let older kids write their own). Their answers are usually hilarious and such a fun peek into their thinking.
Skills developed:
creativity, storytelling, fine motor skills, sensory exploration, language development, cause-and-effect thinking
This craft pairs perfectly with reading Sneezy the Snowman. You can also check out my Favorite Winter Books list if you’re looking to refresh your seasonal reads.
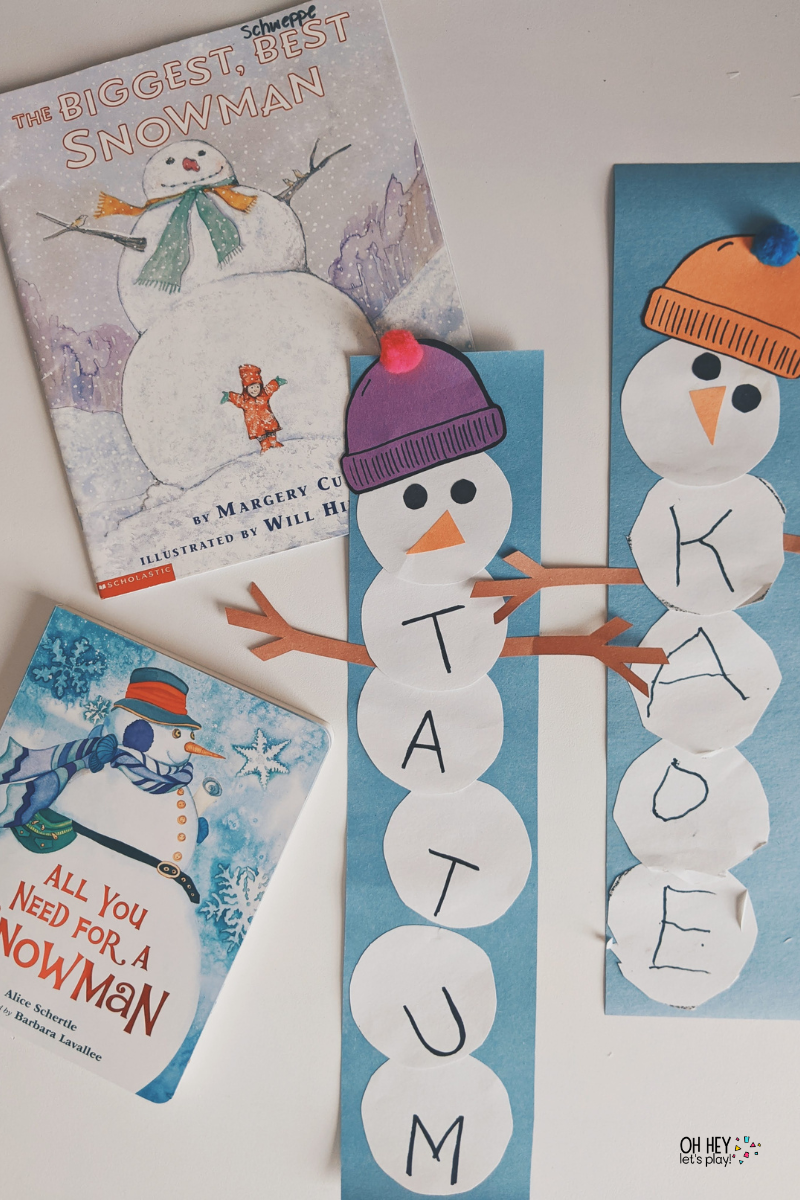
8. Snowman Name Craft (with Printable)
A sweet way to practice name recognition in a wintery way.
Materials:
- large sheet of light blue construction paper (cut into a long strip)
- white construction paper (cut into circles — one per letter in your child’s name)
- colored construction paper (for hats, noses, arms, scarves, etc.)
- glue
- scissors (depending on child’s age, either pre-cut circles for them or have circles traced onto the white paper and let them cut them out using kid-safe scissors)
- black marker
- optional: winter books like All You Need for a Snowman (more winter book recommendations here)
How to set it up:
Cut white circles (or trace them and have children cut them out) — one for each letter in your child’s name.
Either write one letter on each circle for them, or invite your child to write the letters themselves (depending on age/ability).
Glue the circles in a vertical stack on the blue paper to build a tall snowman body spelling out their name in order.
Add details using colored construction paper: a hat, arms, a carrot nose, and any other fun accessories.
You can absolutely free-hand these pieces, or you can grab the free printable I created with the snowman parts already designed and ready to cut — I’ll link that here so you don’t have to start from scratch.
Skills developed:
name recognition, early letter formation, sequencing, fine motor skills, cutting and gluing confidence
9. Secret Snowflakes (Crayon-Resist Art)
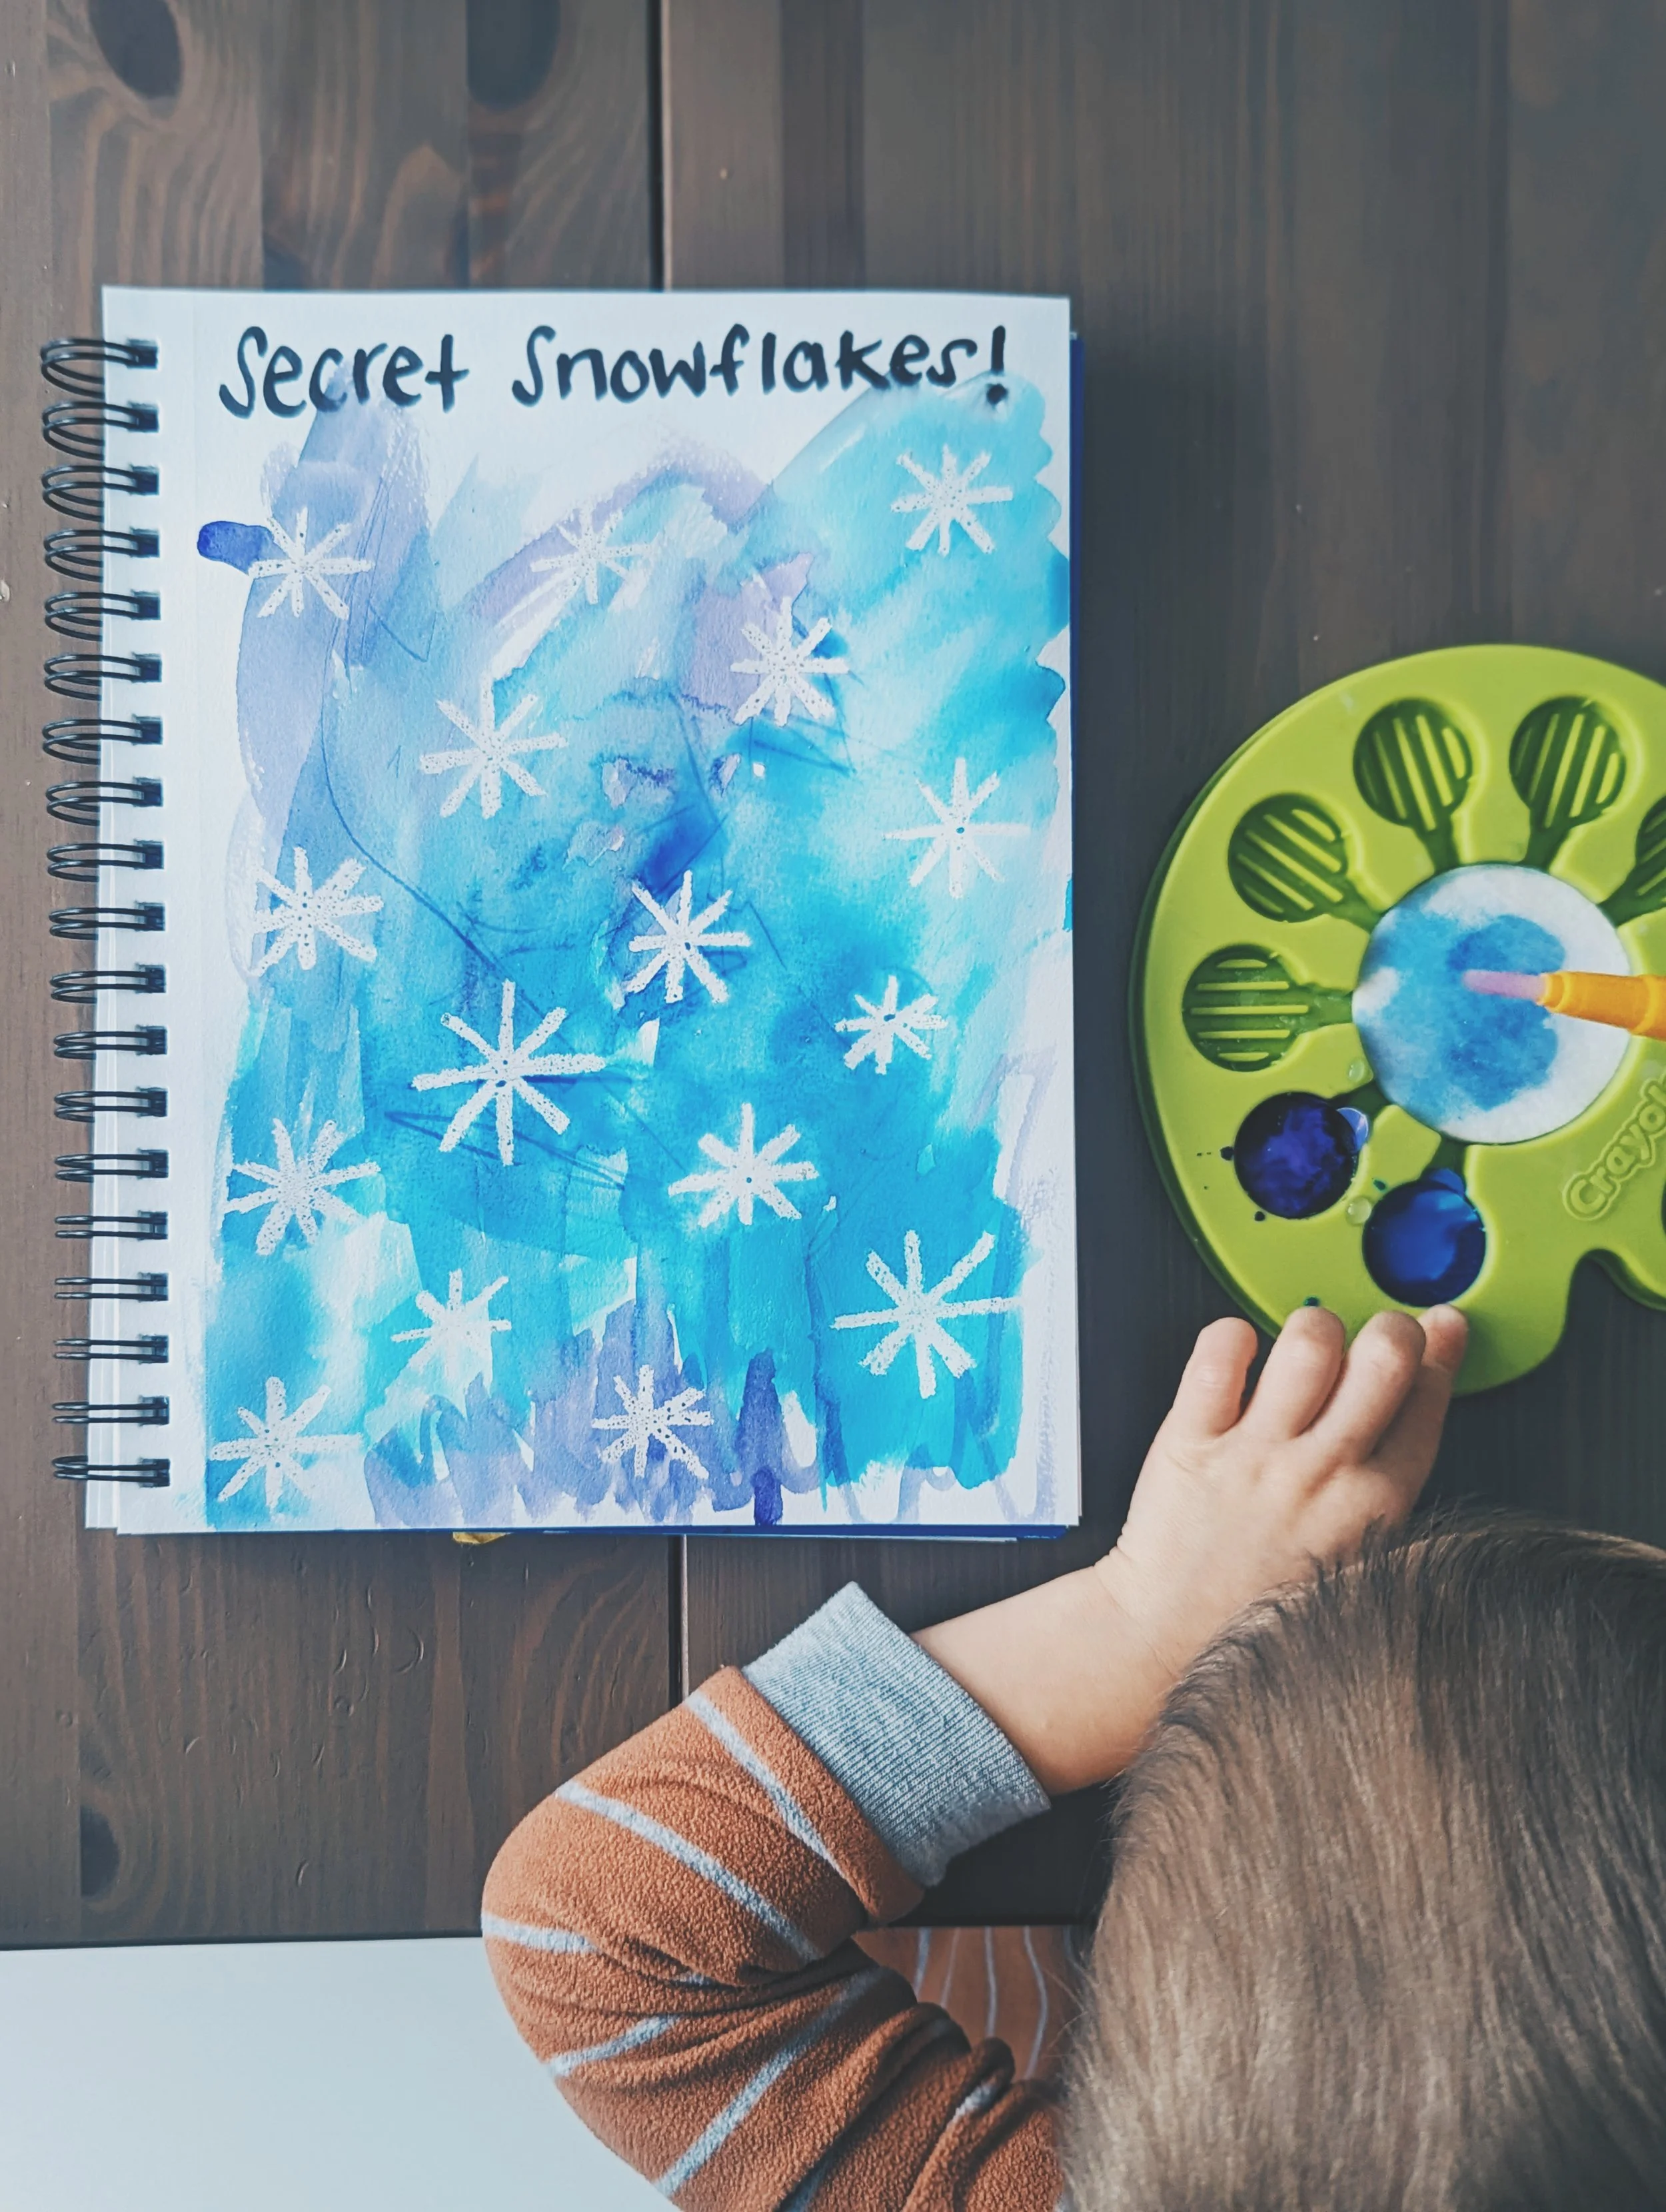
A magical little art activity that works perfectly in a learning journal.
Materials:
- blank notebook
- white (non-washable) crayon
- watercolor paints (cool colors like blue, purple, teal work beautifully)
- optional: black Sharpie for writing a title or date
How to set it up:
Use a white crayon to draw snowflakes all over a journal page. Press firmly and go over each line a couple of times so there’s plenty of wax on the paper.
Invite your child to paint over the whole page using watercolor paints.
As they brush the color across the page, the “secret” snowflakes magically appear where the paint resists the wax.
Skills developed:
fine motor control, hand strength, creativity, hand–eye coordination, cause-and-effect thinking
📓More Winter Learning Journal Activities
These live right in a blank notebook (learning journal) — low prep, easy to modify for different skills and/or age groups, and great for quality time.
10. Polar Bear Shape Match (Learning Journal)
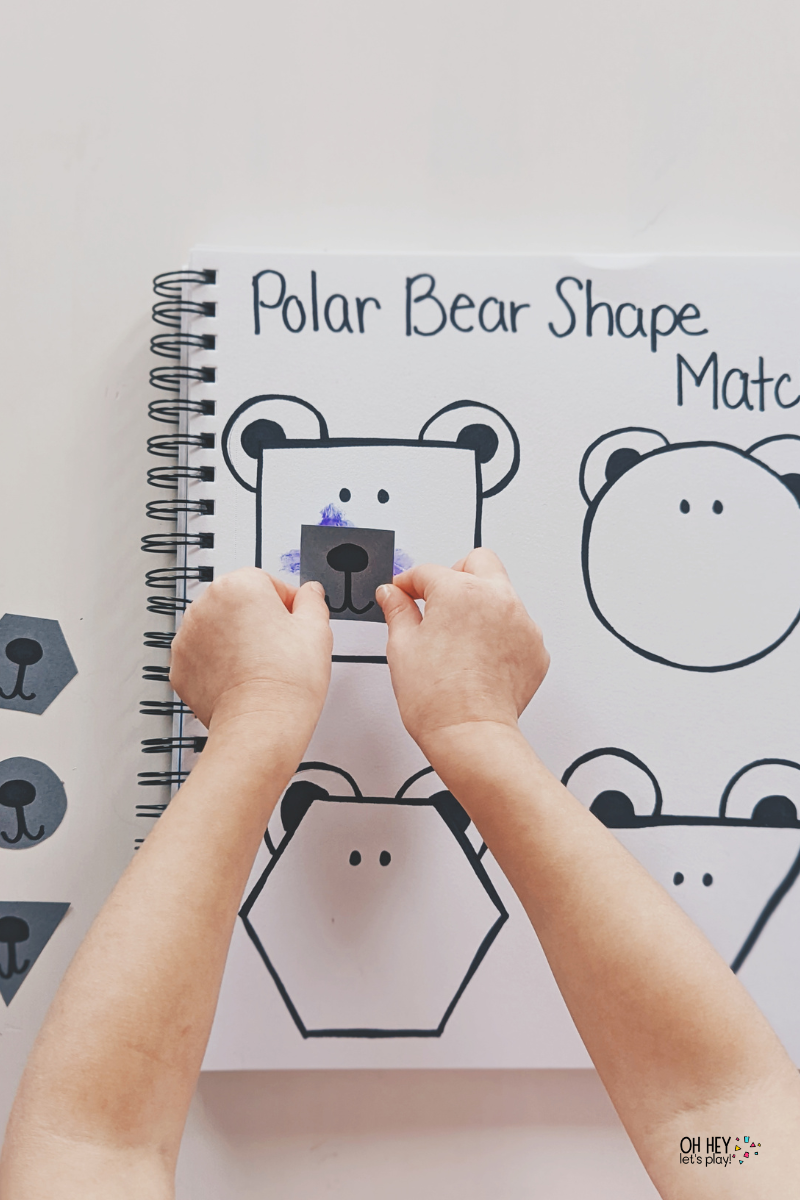
The cutest wintery way to practice shapes!
Materials:
- blank notebook
- gray cardstock paper
- black Sharpie or marker
- glue stick
- scissors
How to set it up:
On your journal page, draw several polar bear faces — each one made from a different shape (circle, square, rectangle, triangle, etc.).
Cut matching shapes out of gray paper.
Use a black marker to add a nose and mouth on each gray shape.
Invite your child to match each gray “nose piece” to the polar bear with the same shaped face. They can glue the shapes down or simply place them if you’d like to reuse the page.
As they work, you can talk about the shapes, count sides, and introduce simple math language like “edges,” “corners,” “curved,” and “straight.”
Skills developed:
shape recognition, fine motor coordination, spatial awareness, early math vocabulary, language development
11. Snowman Sorting (Letters vs. Numbers)
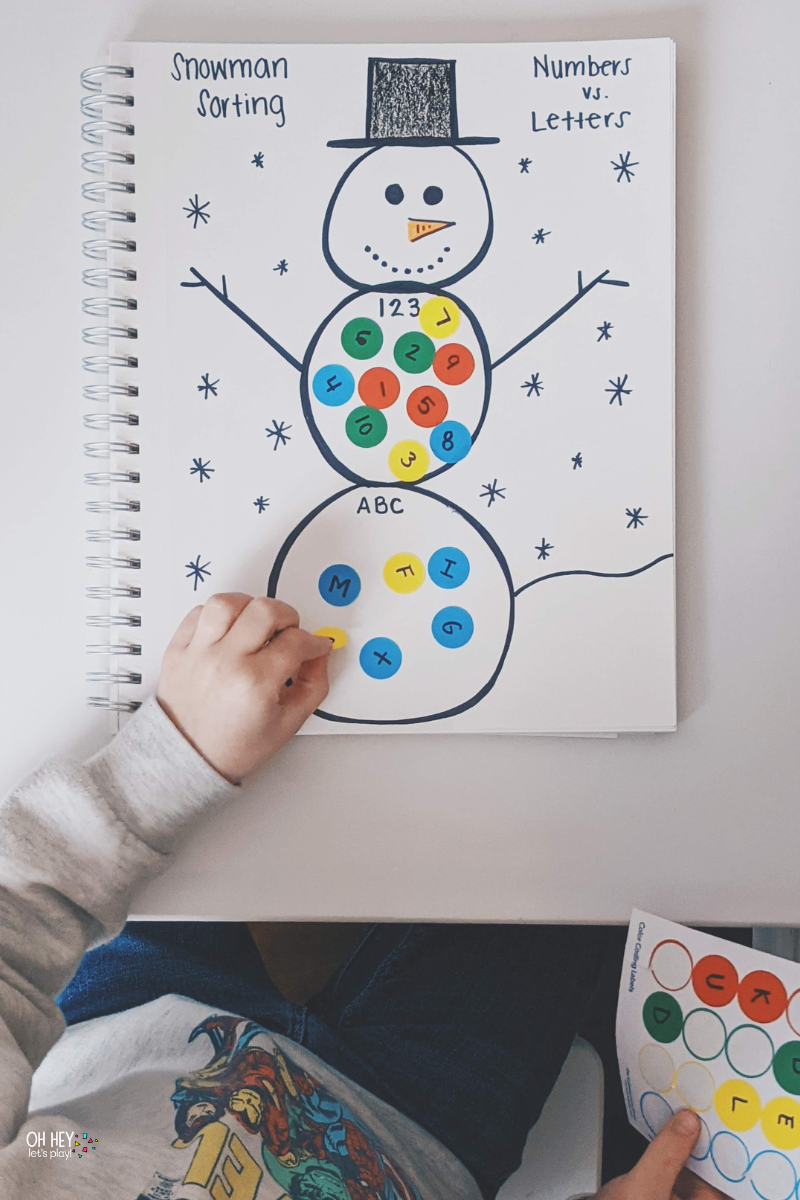
Such a simple setup — but so effective for helping kids understand the difference between letters and numbers.
Materials:
- blank notebook
- dot stickers
- black Sharpie
- crayons or markers
How to set it up:
Open your journal and draw a big snowman.
Label one snowball with “123” and another with “ABC.”
On dot stickers, write a mix of letters and numbers.
Invite your child to peel and stick each dot onto the correct part of the snowman.
You can add questions as they stick:
- “That’s the number 5 — where does it go?”
- “What sound does this letter make?”
- “Can you tell me a word that starts with this letter?”
Skills developed:
number recognition, letter recognition, classifying letters vs. numbers, fine motor skills (peeling + sticking), spatial awareness
⛄ Winter Activity Book & Printable Pack Activities
These ideas use pages from my Winter Activity Book and my Mitten Activity Pack — perfect if you like having things printed and ready to go.
12. Hot Cocoa Ten Frame Counting (Winter Activity Book)
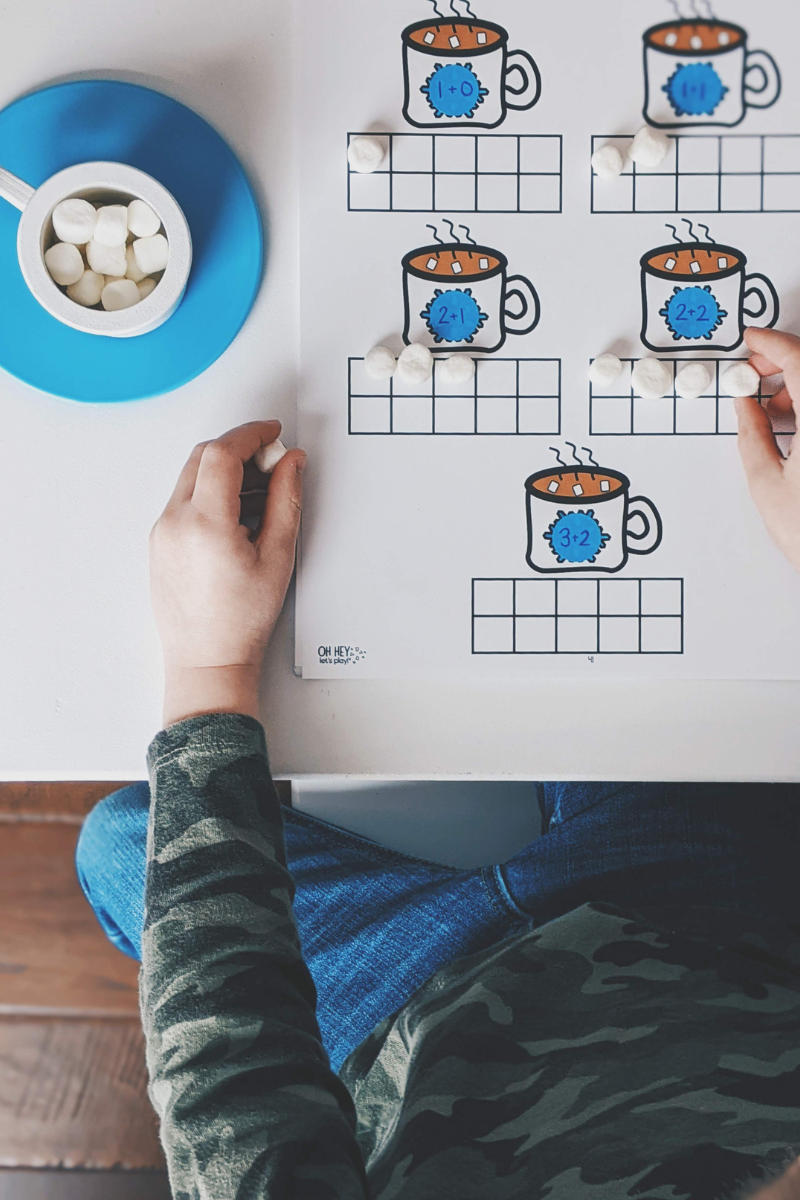
A cozy, hands-on way to work on early math skills.
Materials:
- Winter Activity Book (hot cocoa ten frame page)
- mini marshmallows (or any small manipulative)
- a small play mug or cup (ours are from this well-loved set)
How to set it up:
Each mug on the page has a ten frame and a number. Invite your child to place one mini marshmallow in each box — starting in the top left — until they’ve matched the number.
To add a challenge, you can cover the printed number with a reusable dot sticker and write a simple equation instead (like 2+1 or 3+2). Kids solve the problem using the ten frame and their marshmallows.
Yes, the real mini marshmallows make this extra motivating.😉
Skills developed:
counting, number sense, one-to-one correspondence, early addition, fine motor control, math confidence
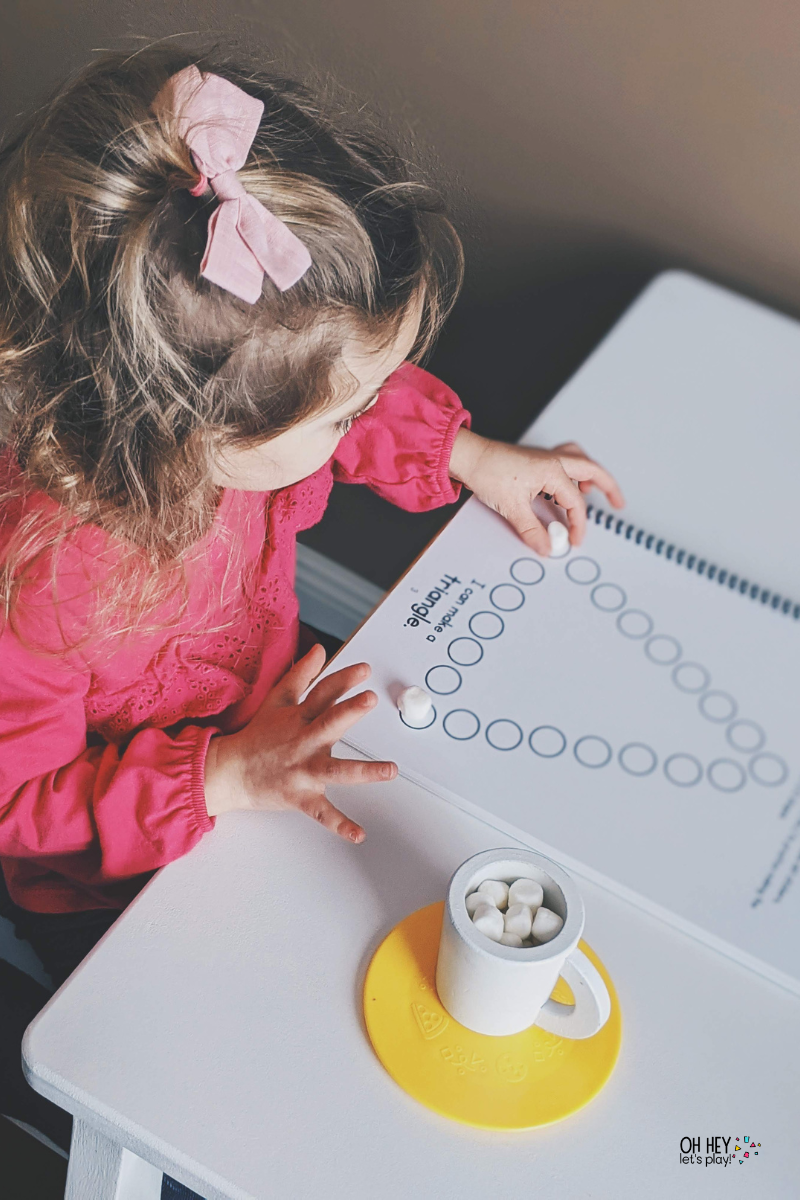
TODDLER VARIATION: Marshmallow Shapes
While my older child is working on ten frames, my toddler loves to feel included. I pull out our Numbers & Shapes Activity Book, provide her own little mug of marshmallows, and she uses them to fill in circles and build shapes on the page.
It’s a simple way to keep multiple ages working side by side at their own level.
13. Pom-Pom Winter Hat Color Match (Winter Activity Book)
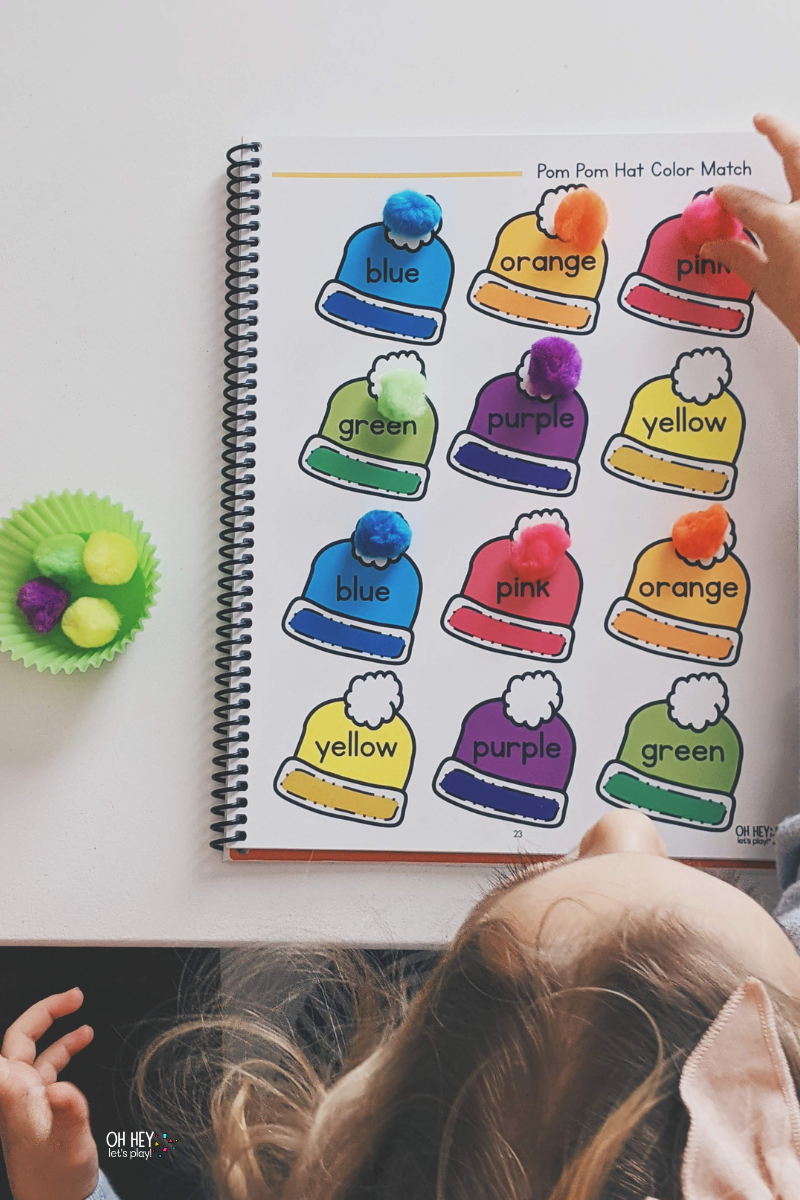
A colorful fine motor workout.
Materials:
- Winter Activity Book (winter hat color page)
- colored pom-poms
- fine motor tweezers or small tongs
How to set it up:
Set out the winter hat page from the book along with a small bowl of pom-poms. Invite your child to use tongs or tweezers to place each pom onto the coordinating colored hat.
It looks simple, but there is so much happening here:
strengthening the small muscles in the hand
developing hand–eye coordination
reinforcing color matching and color words
Skills developed:
fine motor strength, hand–eye coordination, color recognition, matching, spatial awareness, early reading of color words
14. Snowman Numbers (Winter Activity Book)
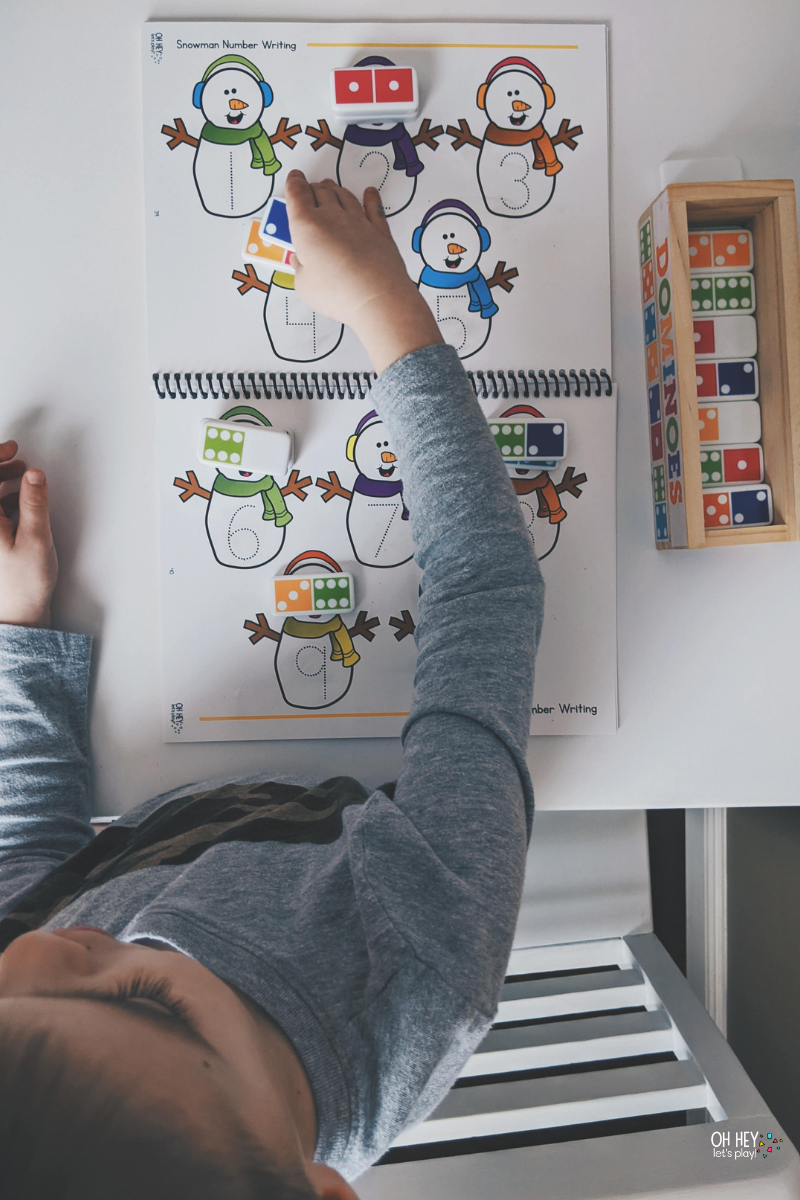
One page, lots of possibilities.
Materials:
- Winter Activity Book (snowman numbers page)
- dominoes or small manipulatives
- dry erase marker (if using the wipe-clean book or the printable in a dry erase pocket)
How to set it up:
You can use this page a couple of different ways:
Trace the numbers: Slip the page into a dry erase pocket and let kids trace each number with a marker to practice number formation and pre-writing.
Domino number match: Lay out dominoes, have your child count the dots, and then place each domino on the snowman with the matching number.
You can also use mini erasers, buttons, or pom-poms and have kids count out the correct number onto each snowman.
Skills developed:
pre-writing and fine motor control, number formation, counting, one-to-one correspondence, number recognition
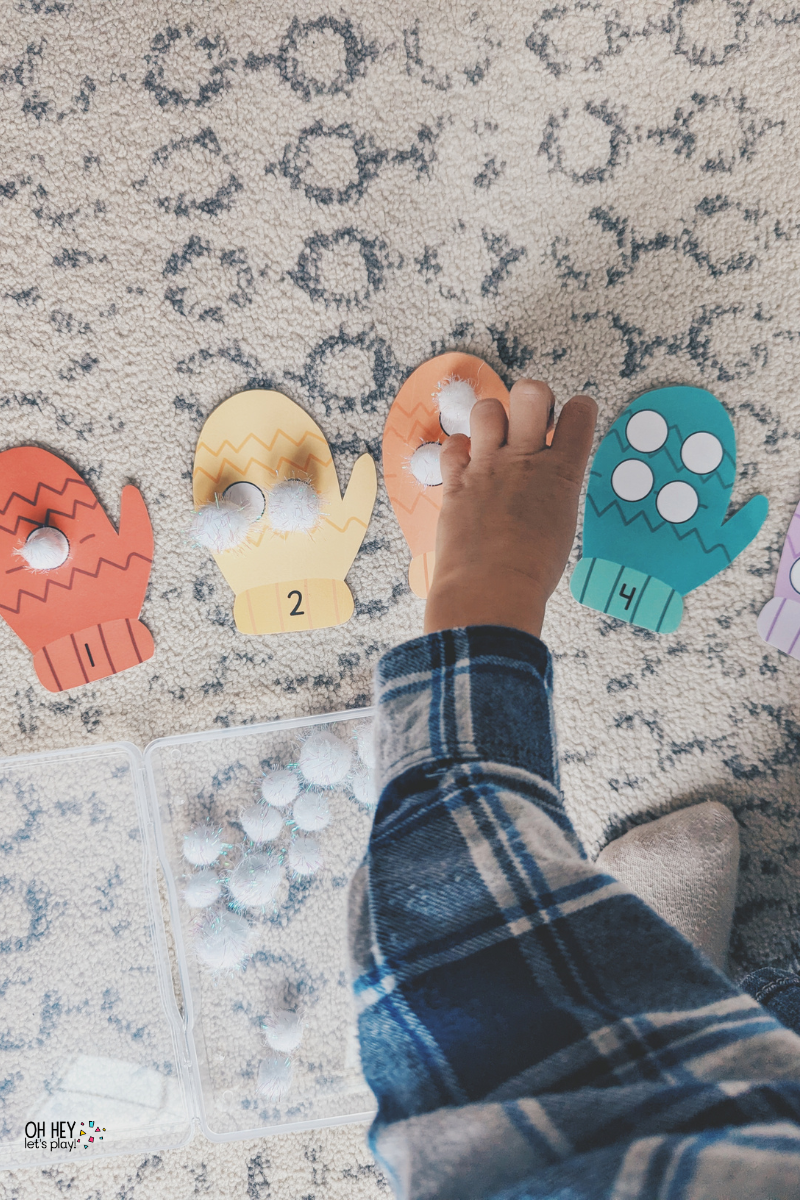
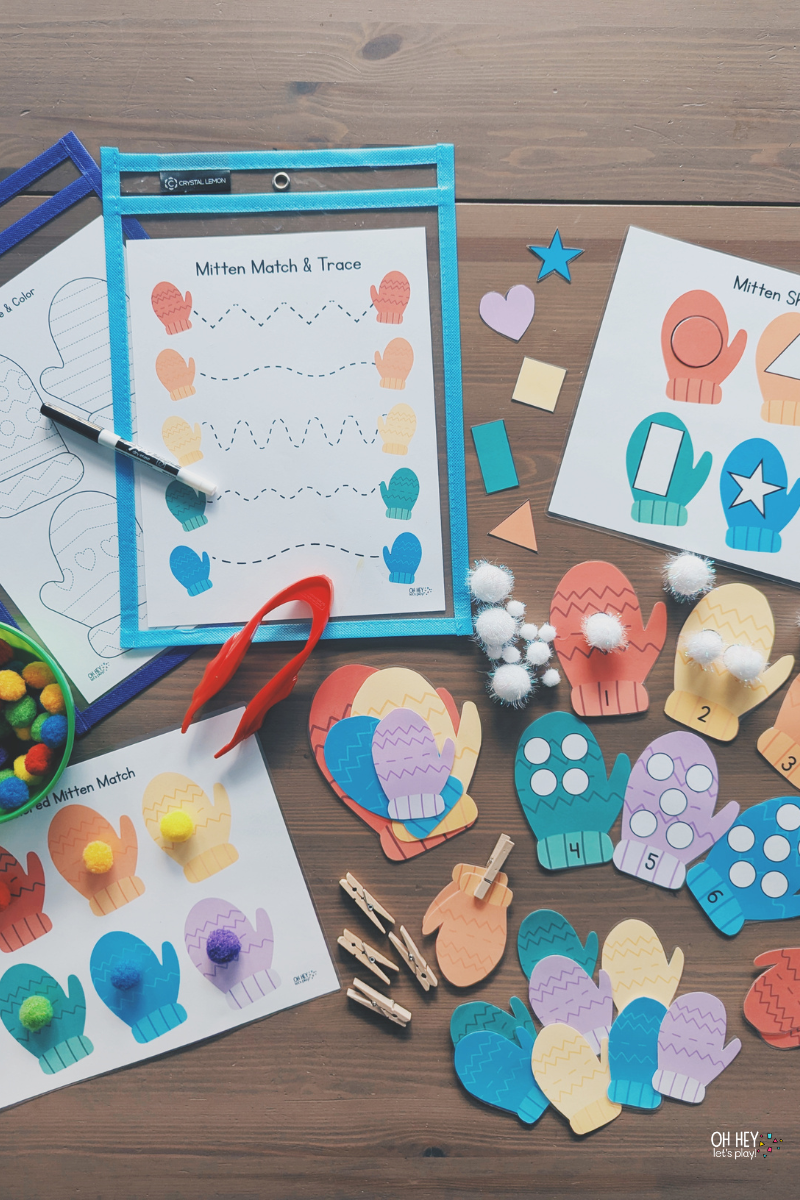
15. Printable Mitten Activity Pack
A whole set of wintery math and fine motor practice in one printable.
Materials:
- printed Mitten Activity Pack pages
- scissors (for cutting pieces)
- laminator (optional)
- pom-poms, mini erasers, or Velcro dots (depending on the page)
- optional: dry erase pockets for tracing pages + dry erase marker
Inside the pack, you’ll find activities like:
- number recognition and counting
- one-to-one correspondence
- color matching
- simple patterns
- tracing and pre-writing practice
- build-a-mitten fine motor activities
For some of the tracing and pre-writing pages, you can slip them into dry erase pockets so kids can practice again and again without reprinting.
In the photo shown above, we’re using sparkly pom-poms to match the number on each mitten, but there are lots of different ways to use the pieces depending on your child’s age and stage.
Skills developed:
counting, number sense, color recognition, patterns, fine motor skills, independence
✋ Fine Motor, Pre-Writing & Gross Motor Winter Activities
16. Build-a-Snowman Wall (Sticky Snowman)
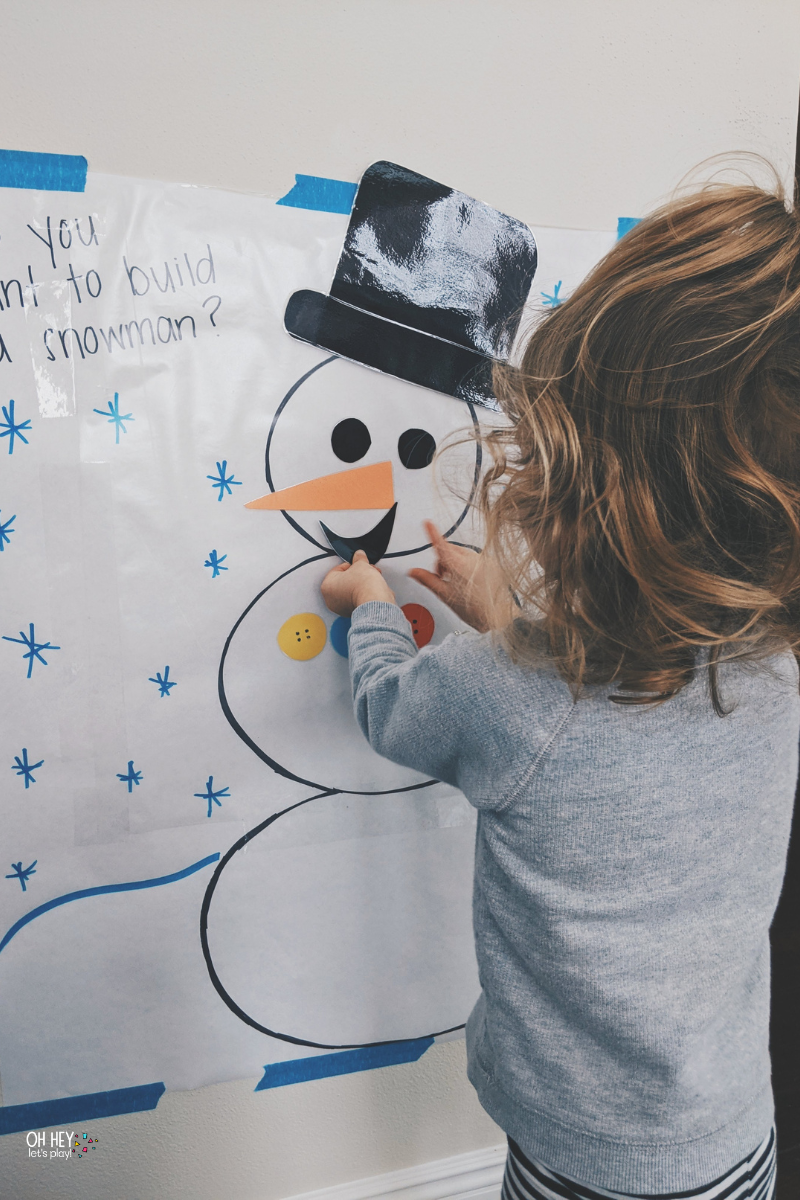
A vertical, reusable way to build snowmen again and again.
Materials:
- large white easel paper
- tape
- clear contact paper
- colored paper (cardstock works nicely; laminating is optional)
- markers
How to set it up:
Draw a large snowman in a snowy scene on a big sheet of easel paper and tape it to the wall.
Cut a sheet of contact paper to the same size and tape it over the picture with the sticky side facing out.
From construction paper, cut out snowman parts: carrot noses, eyes, mouths, buttons, hats, scarves, stick arms, etc. Laminate if you want them to last longer.
Invite your child to press the pieces onto the sticky contact paper to build (and rebuild!) their snowman.
Skills developed:
spatial awareness, fine motor coordination, language development (“hat on top,” “nose in the middle”), creativity, problem solving
17. “Ice Cube” Pattern Match (Snap Cubes)
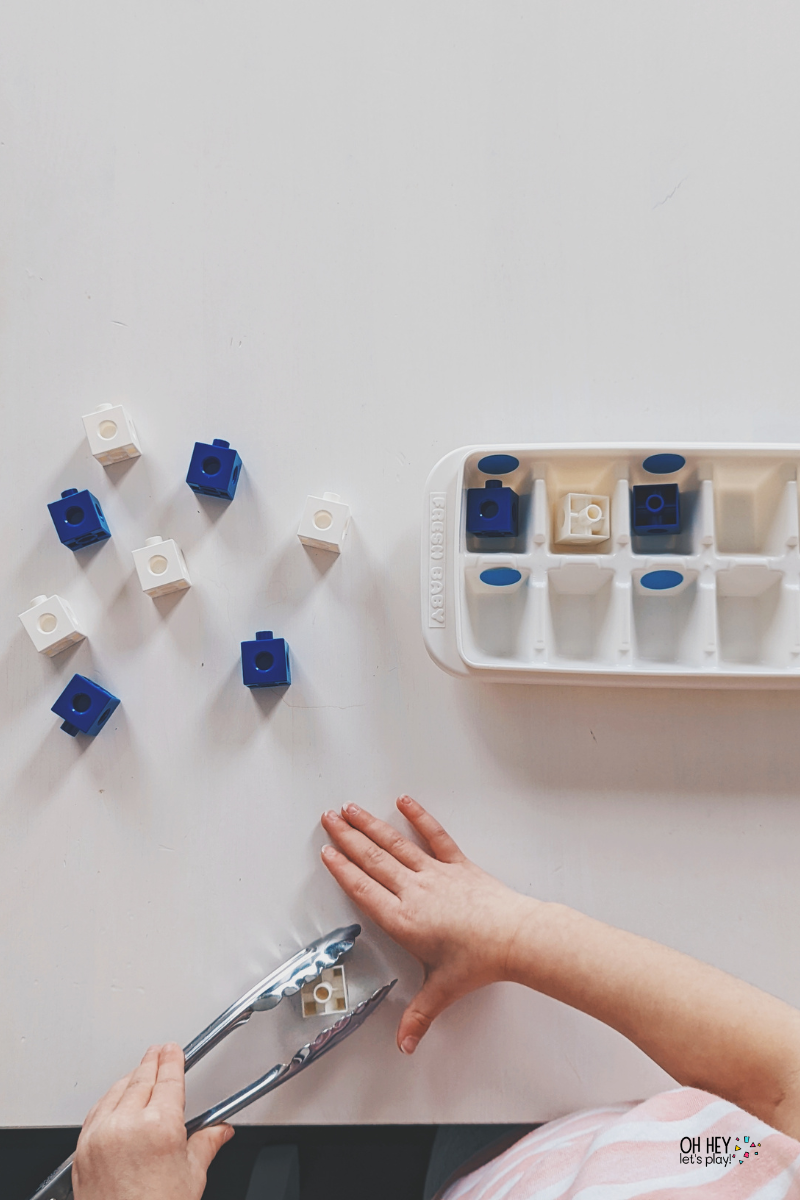
This one looks so simple, but there’s a lot happening for little hands and minds.
Materials:
- ice cube tray
- snap cubes
- removable dot stickers in matching colors
How to set it up:
Place colored dot stickers inside the walls of an ice cube tray.
Set out matching snap cubes.
Invite your child to place each cube into the well with the matching-colored dot. They can use fingers or small tongs for an extra challenge.
Once color matching feels easy, start creating patterns:
“red, blue, red, blue”
“green, green, yellow, green, green, yellow”
Talk about how patterns “take turns” and repeat.
All that pinching, placing, and lining up is great for strengthening the same muscles kids will use for pencil grip, cutting, and everyday tasks like buttoning and zipping.
Skills developed:
fine motor strength, hand–eye coordination, color recognition, pattern recognition, early math thinking, problem solving
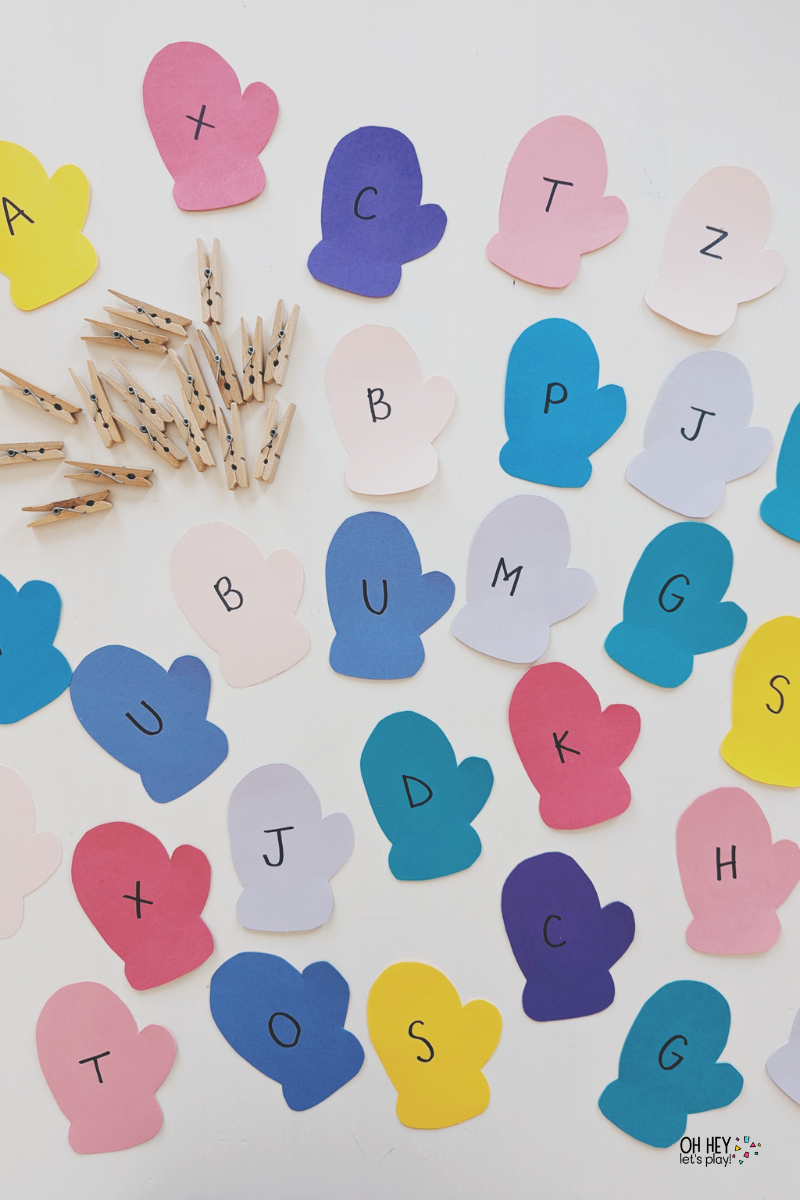
18. Mitten Letter Match with Clothespins
A hands-on, fine motor alphabet activity.
Materials:
- colored cardstock or construction paper (cardstock holds up best)
- mitten template (print on colored cardstock, make your own template to trace and cut out, or use these mitten cut-outs)
- black Sharpie or marker
- clothespins or mini clothespins- optional: string to create a clothesline
How to set it up:
Use a mitten template to print out mittens on different colors of cardstock.
Write letters on the mittens — all uppercase, all lowercase, or a mix depending on what your child is working on.
Make pairs of matching letters.
Invite your child to find matching mittens and clip them together with clothespins.
For an added layer of fun, stretch a piece of string between two chairs or across a table and have kids clip the matching mitten pairs onto the “clothesline.”
Skills developed:
letter recognition, matching, fine motor strength (those clothespins are hard work!), hand–eye coordination, early literacy confidence
19. Snowy Day Salt Tray
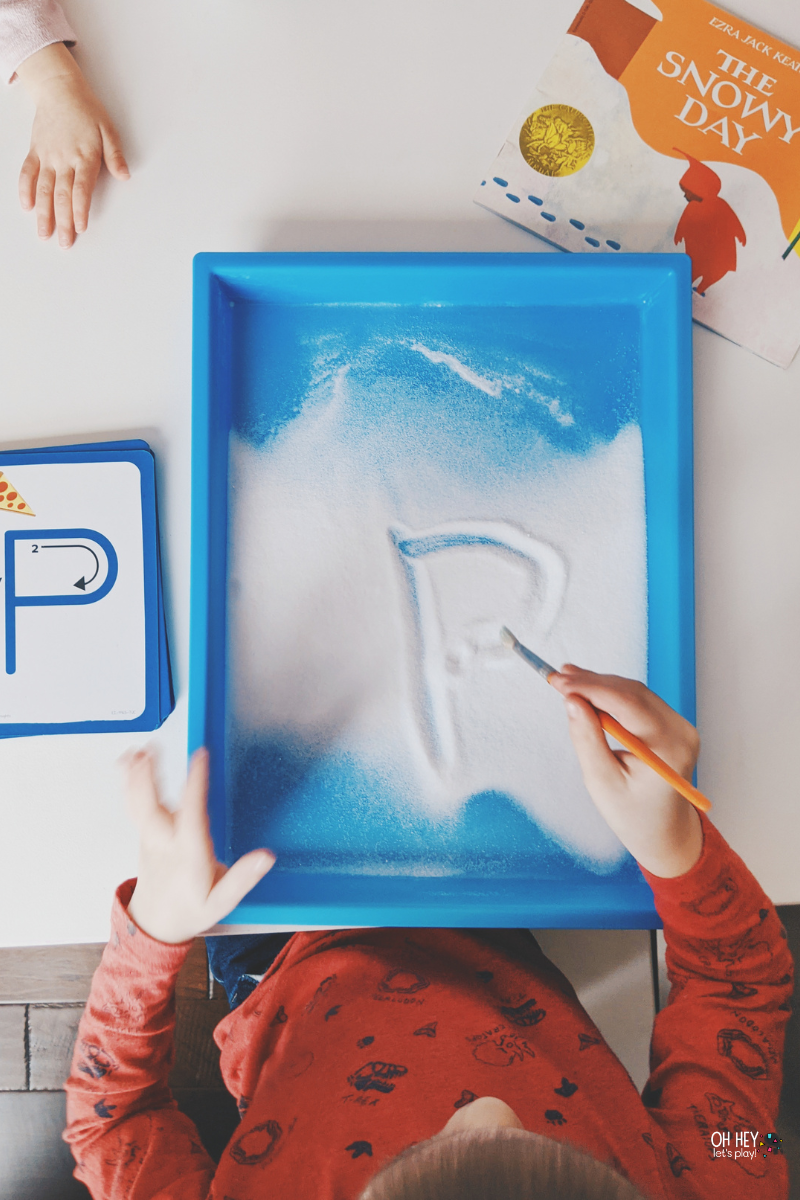
A book-based pre-writing activity inspired by The Snowy Day by Ezra Jack Keats.
Materials:
- shallow tray or baking dish
- salt (enough to lightly cover the bottom)
- paintbrush
- letter formation cards
- optional: a copy of The Snowy Day
How to set it up:
Pour a thin layer of salt into the tray.
Set out a paintbrush and a few letter formation cards.
Read The Snowy Day, and then invite your child to “drag” the paintbrush through the salt like Peter dragging his stick through the snow.
They can:
- copy letters from the cards
- practice the first letter of their name
- draw shapes and lines
- simply explore making marks
Using a paintbrush instead of a pencil can feel less intimidating for kids who are still developing grip strength and confidence.
Skills developed:
pre-writing strokes, letter formation, hand–eye coordination, fine motor control, sensory regulation
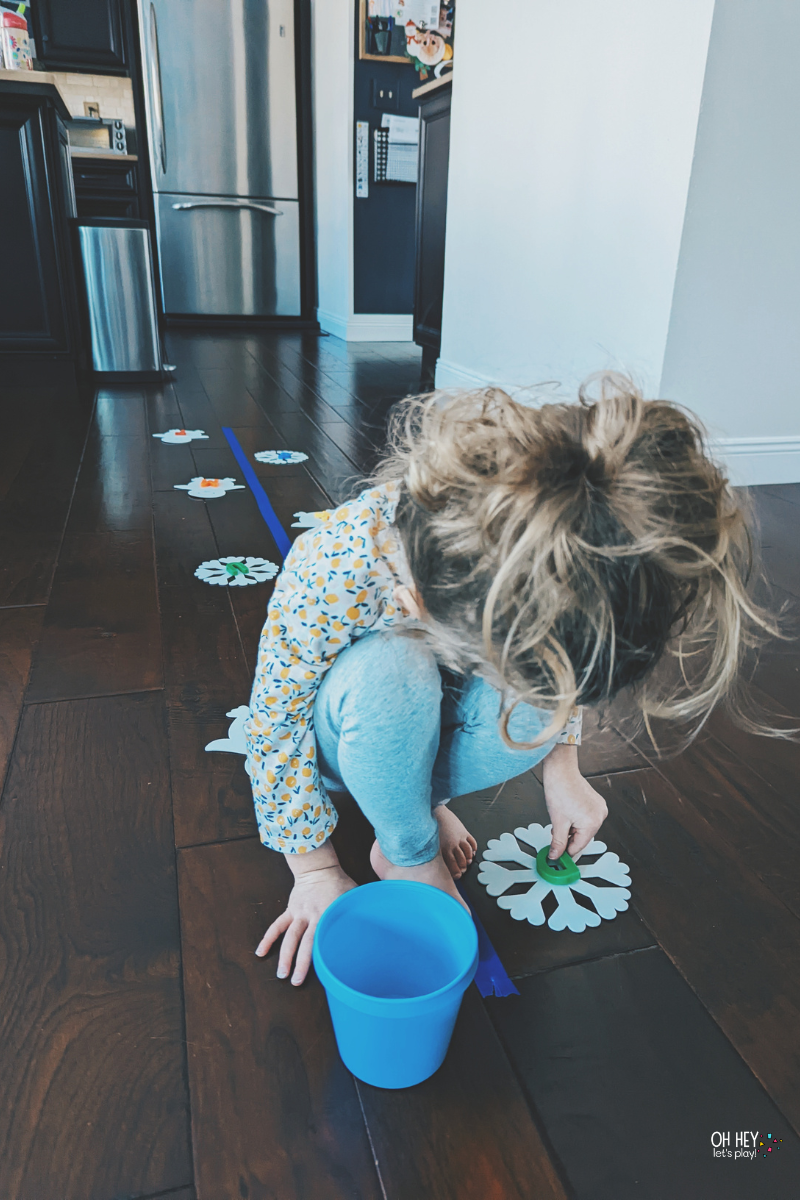
20. Winter Letter Walk
A full-body way to practice letters — perfect for high-energy days inside.
Materials:
- painter’s tape
- foam winter shapes (Dollar Tree and craft stores are also great for these)
- black sharpie (for writing letters on the shapes)
- bin or bucket of loose letters
How to set it up:
Use painter’s tape to create a simple “path” on the floor — a straight line, zigzag, or gentle curve.
Tape foam winter shapes along the path and write a letter on each one.
Fill a small bin with magnetic letters or letter tiles that match the ones on the floor.
Invite your child to walk heel-to-toe along the taped path.
Each time they reach a foam shape, they:
- stop and identify the letter
- squat or bend down to find the matching letter in the bin
- place it on top of the foam shape
This brings in so much good gross motor work — balance, core strength, deep squats — while also reinforcing letter recognition in a playful way. Feel free to swap out letters with numbers or even early reading practice depending on your child’s age and what skills they’re working on!
Skills developed:
gross motor skills (balance, coordination, core strength), body awareness, letter recognition, matching, attention and focus
I hope this list gives you a stash of easy indoor winter activities you can come back to all season long — whether you need a quick sensory bin, a calm learning journal prompt, a cozy craft, or a low-prep math page from a printable you can reuse year after year.
If you want even more support planning play without scrolling Pinterest forever, you might also love:
my Learning Journal Membership (hundreds of learning journal activity ideas by age, plus printables, modifications, and supply links)
the Winter Activity Book (teacher- and mom-created, reusable, wipe-clean fun- also available as a digital download)
my Favorite Winter Books list (so many fun pairings for these activities!)
You can always mix and match these ideas, repeat your child’s favorites, and adjust for different ages. Be sure to tag me @ohheyletsplay if you try any of these ideas and share on social media — I’d truly love to hear which ones your kids enjoy most!💙